Well I finally talked my husband into actually building bunk beds for the girls. I found the idea of triple bunk beds on Pintrest. I thought it was a great idea with three girls. My husband wasn't sure since we do have a 4 bedroom house. We want to keep one room for guests and my craft room plus some storage, so two would always have to share. I don't want to deal with fighting over who shares with who.
We finally came to the conclusion that we could use one room for my sewing and crafts and the other could be turned into a school room for as long as we home school. Both can still be used for guests.
Well husband and I threw some ideas around. We liked the idea but didn't love the plan we found that was mounted to the wall. My husband decided to use posts to make it sturdy and mount the beds to that instead.
I didn't want an actual ladder, like the plans we had found, since the girls are still pretty little and steps wouldn't work, so my husband made a combination of the two.
My husband is a rock-star and finished building it in one weekend. By that Wednesday he was able to put it together and the next day we took a trip to IKEA to get mattresses.
We haven't moved the two year old down yet. I took her crib apart and turned it into the toddler bed at the same time as the other two got her bunk bed. She can't handle being with her sisters yet.
I also don't want the three year old, who is currently on the bottom bunk, crawling out of the middle bunk in the middle night. She is in our room at least once a week.
It is ready for the little one when the little one is ready to move in with her sisters even if it will be another couple of years.
Mom life is hard and full of adventure. Come along with me as I navigate this world while homeschooling, homesteading, homemaking, and working from home.
Showing posts with label DIY. Show all posts
Tuesday, January 28, 2014
Monday, April 15, 2013
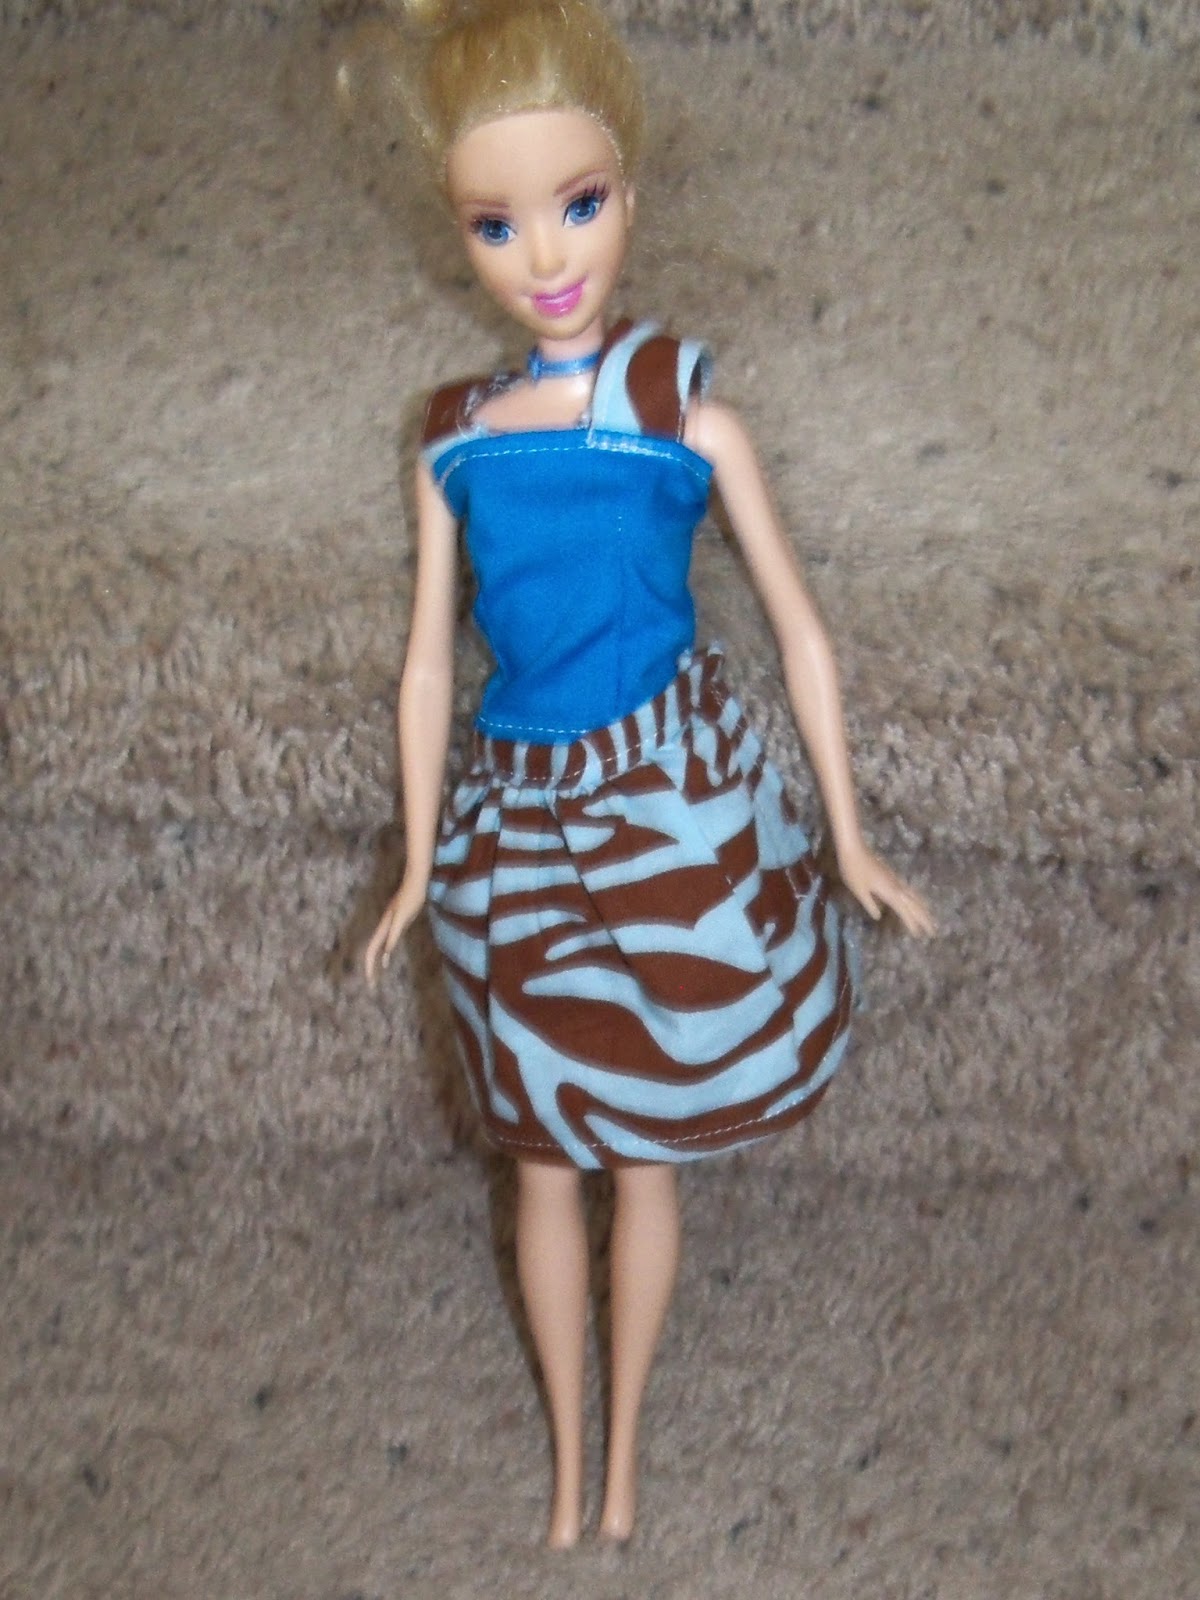
Save money: make your own Barbie clothes
My 4 year old received her first Barbie two years ago for Christmas. At first it never really got played with but now that is almost all she plays with. Her 2 year old sister is starting to love Barbies too. The clothes the dolls came with don't look so good. Some are just plain falling apart. The Barbie clothes are so expensive and many outfits, I don't feel, are appropriate for my little ones, so I thought about getting a few patterns to make some myself.
One day, while searching Pintrest, I came across a pin about how to make Barbie clothes on craftinessisnotoptional.com. After checking it out I thought it was great, so I dug out scrapes and decided to try it. The tutorials were so incredibly easy to follow and the clothes came out looking great. I made some dresses to match the girls' Easter dresses and they went in their Easter baskets. Then I made several dresses, a couple skirts, and a shirt.
The clothes are small so they aren't the easiest to sew. Barbie clothes aren't for beginners but if you've sewed clothes for yourself or kids before, these will be extremely easy to do.
My daughters love the new Barbie clothes and can put them themselves. My oldest keeps asking for more clothes for her Barbies. She loves to change them into new clothes frequently.
My 4 year old and 2 year old were very excited when I asked them to take some pictures of their Barbies and all their new clothes. The pictures are all linked up to the tutorial for those clothes.
| Cap sleeve shirt and skirt |
| Formal/Ball Gown Dress |
| Shortened Formal/Ball Gown |
| Dress |
| Dress |
Wednesday, April 10, 2013
DIY Easter or Spring Dress for Girls
I love making my daughters dresses. My four year old is in major need of some new ones including more dressy "Church dresses", which she likes to call them. So for Easter, I found a wonderful online tutorial for a cute but simple dress.
We went to the fabric store, where she picked out the flowers herself rather quickly. We then found the pink polka dots right above that and she was happy and ready to go. It was fun shopping with her since she really knows what she wants now.
The tutorial was very easy to follow and took me about an hour and a half. There were a couple things I did a little differently. I used a bodice pattern I already had to create the new bodice pattern instead of making my own from scratch. I also made the skirt flare out slightly so it wasn't quite so snug but still looks a-line.
For tutorial click here
We went to the fabric store, where she picked out the flowers herself rather quickly. We then found the pink polka dots right above that and she was happy and ready to go. It was fun shopping with her since she really knows what she wants now.
The tutorial was very easy to follow and took me about an hour and a half. There were a couple things I did a little differently. I used a bodice pattern I already had to create the new bodice pattern instead of making my own from scratch. I also made the skirt flare out slightly so it wasn't quite so snug but still looks a-line.
For tutorial click here
Tuesday, March 12, 2013
DIY Princess dresses
My daughters love to dress up. They really love to dress up as princesses. Not just any princesses but Disney princesses. I have tried a few and have had requests from my daughter for more dresses. For Christmas I made her a Rapunzel dress with a wig and her birthday in January I made her a Cinderella dress.
Most dresses I find in the store start at $20. They also last a very short time since they are very poorly made. There are a few options for you if you choose to make your own. I used a few patterns I already had. Hancock often has them for $.99 or $1.99. I just pick and choose from different patterns what I need and adjust if I need to. My daughter didn't care if it didn't look exactly like the dress from the movies. As long as it looks similar. It really just has to be the same color and she's fine.
Another option is to follow a free tutorial. You may still need to adjust the sizes and sometimes draft your own pattern. The links below will provide you with tutorials for other princess dresses. I have tried a few and am looking forward to trying more. My 4 year old dresses up almost everyday.
| Christmas Morning |
Most dresses I find in the store start at $20. They also last a very short time since they are very poorly made. There are a few options for you if you choose to make your own. I used a few patterns I already had. Hancock often has them for $.99 or $1.99. I just pick and choose from different patterns what I need and adjust if I need to. My daughter didn't care if it didn't look exactly like the dress from the movies. As long as it looks similar. It really just has to be the same color and she's fine.
Another option is to follow a free tutorial. You may still need to adjust the sizes and sometimes draft your own pattern. The links below will provide you with tutorials for other princess dresses. I have tried a few and am looking forward to trying more. My 4 year old dresses up almost everyday.
- Rapunzel
- Rapunzel Hair
- Cinderella
- Disney Princess Felt Dress up Aprons
- Snow White
- Snow White top
- Mermaid
- Belle
- Tinker Bell
Monday, February 4, 2013
Saving Money on dishwasher soap
As a stay at home mom who is in charge of the shopping and the finances I know how much things cost and I'm always trying to find ways to save money that doesn't require hours of clipping coupons. One thing that seems to add to our budget is dishwasher soap. A container lasts a little over a month and then I am always having to buy the Rinse Aid to go with it. The most logical way to save money would be to hand wash everything but doing dishes three times a day doesn't really sound fun, does it?
A few years ago I started cleaning with baking soda and vinegar. I found a recipe for dishwasher soap. It worked fine but it was a tablespoon of one thing and two of another. When we moved into our new house it just didn't work very well and I gave it up.
A few months ago I came a across a recipe that was so incredibly simple that I figured I should at least give it a try. I did and it worked great! I have been using it for 2 months now and don't plan on going back to store bought. I did change a few things in the wash routine that has helped tremendously.
Here are some tips in making the most out of your dishwasher:
- RINSE everything. The less food on the dishes the better.
- Clean out the bottom of the dishwasher every single time. You'd be surprise at the food that was left on dishes.
- Run hot water in the sink with disposal for a few minutes before you start your dishwasher.
- Run your garbage disposal and make sure it is clear before you start your dishwasher.
Dishwasher Soap Recipe
1 cup borax
1 cup washing soda
1 Tablespoon Lemi Shine or Lemonade (sugarless kind)(this becomes your rinse aid)
2 Tablespoons of soap in each load. (This last about a month and I run the dishwasher at least every other day)
You can use Lemi Shine to clean your dishwasher also, which I would recommend doing once a month especially if you have hard water.
I'd love to hear if it worked for you!
Monday, January 28, 2013
Prom Dress Redos
Here's where having three little girls comes in handy. My now 4 year old is a little princess and dresses up almost every day. I shortened my old formals and they became her "new" princess dresses. It is so easy to do even if you don't have a sewing machine. All you need to do is get some stitch witchery from Walmart and hem the bottom to fit. So simple and your little princess will be so delighted.
If you no longer have any laying around this is the perfect chance to ask your friends if they want to donate any of their old formals to you. Check out garage sales too, you may get lucky and find a few for a couple of bucks. I'd rather do that then spend $20 or more on a single dress-up dress that is poorly made. Everything has to make it through three girls.
Friday, December 28, 2012
DIY: Crochet Dish cloths
Now that Christmas is over with and you have extra yarn laying around, what are you going to do with it? Well I had several little balls of yarn and had no idea what to do with it. One day it dawned on me, why not make some simple wash cloths. I needed new dish cloths anyway so I why not make a few. I didn't need anything fancy since it is just for scrubbing dishes.
I just took my left over yarn and started experimenting. I just made it the width to match the washcloths I already had. You can use whatever stitch you prefer. I prefer the single crochet because it makes a much tighter stitch.
They work great and cost me nothing. I used every bit of extra yarn I had. I don't care if there is different colors of yarn. I like being able to use what I already have to make something that I need. Whenever I can save money, even a few dollars, I try. It does make a difference even if you don't see it.
For all you beginning to crochet here is a great pattern to practice on (great for young kids first learning to crochet):
Simple Crochet Washcloths
G size hook or (whatever you have close to that)
Leftover yarn
I started by chaining 31, but if you want your washcloth bigger or smaller adjust to the size you want
I prefer to use a single crochet to make it tighter but you can use any stitch you like.
Single crochet in each chain across (30), chain one, turn
Single crochet in each single crochet (30), chain one, turn
Continue until finished
(If you are looking to practice all your stitches or even more complicated ones, vary your rows by doing a different stitch on each row. You can practice and get something practical in the end.)
Here are more great patterns if you want something more complicated to try for yourself or as a gift:
Ball Hank n' Skein
Creative Jewish Mom
I just took my left over yarn and started experimenting. I just made it the width to match the washcloths I already had. You can use whatever stitch you prefer. I prefer the single crochet because it makes a much tighter stitch.
They work great and cost me nothing. I used every bit of extra yarn I had. I don't care if there is different colors of yarn. I like being able to use what I already have to make something that I need. Whenever I can save money, even a few dollars, I try. It does make a difference even if you don't see it.
For all you beginning to crochet here is a great pattern to practice on (great for young kids first learning to crochet):
Simple Crochet Washcloths
G size hook or (whatever you have close to that)
Leftover yarn
I started by chaining 31, but if you want your washcloth bigger or smaller adjust to the size you want
I prefer to use a single crochet to make it tighter but you can use any stitch you like.
Single crochet in each chain across (30), chain one, turn
Single crochet in each single crochet (30), chain one, turn
Continue until finished
(If you are looking to practice all your stitches or even more complicated ones, vary your rows by doing a different stitch on each row. You can practice and get something practical in the end.)
Here are more great patterns if you want something more complicated to try for yourself or as a gift:
Ball Hank n' Skein
Creative Jewish Mom
Wednesday, November 28, 2012
Felt Christmas Tree for Kids
Christmas trees and children never mix. Last year I didn't even want to set ours up until a few days before. I was dreading having a two year old and one year old playing with the tree every time I turned around. Well the husband didn't listen and it was up for a few weeks and of course the girls were in it constantly.
This year my husband set our tree up the weekend before Thanksgiving. We have NEVER had it up so early. Now with three little girls this felt like a nightmare but I couldn't tell my husband no to the tree. The saving grace has been an idea floating around pintrest, a felt tree for your kids to decorate. Genius!
My Black Friday shopping was at Hancock Fabrics where I purchased the felt for the tree. It costs me a few dollars to make and about a half hour to put together.
What you need
I made a star for the top out of yellow and traced circles on the sheets of felt I had purchased for Christmas balls. The ornaments can be as fancy or simple as you want them to be. Just use your scraps to add embellishments. You can also use glitter glue or puffy paints to make them more fun.
I'm sure pieces will be lost so next year I can easily add different pieces and make my current ones fancier but for this year simple is best.
This year my husband set our tree up the weekend before Thanksgiving. We have NEVER had it up so early. Now with three little girls this felt like a nightmare but I couldn't tell my husband no to the tree. The saving grace has been an idea floating around pintrest, a felt tree for your kids to decorate. Genius!
My Black Friday shopping was at Hancock Fabrics where I purchased the felt for the tree. It costs me a few dollars to make and about a half hour to put together.
What you need
- sharp sissors
- 1/2 yard of green felt (sold by the yard at fabric stores)
- 1 sheet of brown for tree trunk
- variety of felt colors (sold in sheets at craft stores)
- Tacky glue or craft glue
- circle to trace for Christmas balls
- any other shape to trace for ornaments
I made a star for the top out of yellow and traced circles on the sheets of felt I had purchased for Christmas balls. The ornaments can be as fancy or simple as you want them to be. Just use your scraps to add embellishments. You can also use glitter glue or puffy paints to make them more fun.
I'm sure pieces will be lost so next year I can easily add different pieces and make my current ones fancier but for this year simple is best.
Monday, November 26, 2012
DIY: Granola Bars
Below I have two different recipes. I love the peanut butter recipe and so does my family, but not everyone does or can eat it so I have also included a recipe that I enjoy without peanut butter.
Peanut Butter Chocolate chip Granola Bars
2 cups crispy rice cereal
1 1/2 cups quick oats
1/2 cup packed brown sugar
1/2 cup honey
1/2 cup peanut butter
1 tsp vanilla
1/4 cup mini chocolate chips
In a large bowl, stir oats and rice cereal together. Set aside. In a small pan bring the brown sugar and honey to a boil, remove from heat and stir in the peanut butter. Let it cool a bit, add the mini chips, and then spread into a buttered 9×13″ cake pan.
Chocolate Chip Granola Bars from Lauren's Latest
Ingredients:
1/4 cup butter
1/4 cup honey
1/3 cup packed brown sugar
2 cups quick cooking oats {not rolled oats!}
1 cup crispy rice cereal
1/2 teaspoon vanilla
2 tablespoons mini chocolate chips
Directions:
In a large bowl, stir oats and rice cereal together. Set aside. In a small pot, melt butter, honey and brown sugar together over medium high heat until it comes to a bubble. Reduce the heat and cook 2 minutes. Pour in vanilla and stir. Pour over dry ingredients and mix well to moisten all ingredients. Pour into lightly greased small jelly roll pan {about 12x8x1} and press out to be about 3/4 inch in thickness. {If your pan isn’t small enough, pack the mixture into one side. You really want to press them down so they stick together.} Sprinkle with mini chocolate chips and press down lightly. Cool on a countertop to room temperature for two hours or until the chocolate chips are set before cutting into bars. Wrap in parchment or plastic wrap and store at room temperature.
Recipe Notes: If your granola bars don’t seem to be staying together when you cut them, you may have made them too thin or you didn’t pack them in tight enough. Stick them in the fridge for 20 minutes and that should help keep them together. {Be sure not to keep them in there too long or else they’ll become super hard!} The next time you make them, try reducing the butter to 3 tablespoons and really packing them down.
Monday, November 19, 2012
DIY: Fruit Snacks
My girls love fruit snacks, but our grocery budget doesn't always allow for extras. I also like to find healthier alternatives with less preservatives and other ingredients I've never even heard of. I came across two different recipes and both are very simple to make.
The first recipe is the one my girls enjoy the most. It is very similar in texture to the fruit snacks bought in the stores and costs around $1.00 for each batch. Each batch will make close to the same amount as a small box of fruit snacks.
You will need jello molds which can be found at Walmart or ice cube trays. I use ice cube trays from IKEA that have flower, heart, and star shapes.
1 (3 oz) package gelatin, any flavor
2 (.25 oz) envelopes unflavored gelatin
1/3 c. water
Directions:
Sprinkle the gelatin over the water in a small saucepan. Heat over medium heat and stir until gelatin is completely dissolved. Pour into molds and allow to set at least 20 minutes.
I love the next recipe. It has real fruit making it much tastier and much healthier alternative.This is more grown up fruit snack that even my picky husband enjoys.
Gummy Fruit Snacks from All Day I Dream About Food
1 cup mixed berries
1/4 cup water
1/2 cup applesauce
1/2 cup fruit juice (apple, cranberry, blueberry, whatever)
2 envelopes gelatin (1 envelope = 2 1/2 tsp)
In a small saucepan over medium heat, combine the berries and water. Bring to a boil and cook until berries are soft, about 5 minutes. Transfer to a blender or use an immersion blender to puree berries until smooth. Return to pot. Add applesauce and return to a boil, then remove from heat, cover and set aside.
In a large bowl, sprinkle gelatin over fruit juice and let stand one minute. Add hot fruit mixture and stir until gelatin completely dissolves, 3 to 5 minutes.
Pour into 8 x 8 inch glass or ceramic baking dish (or into molds, if you want to go that route). Refrigerate until firm, about 3 hours. Cut into blocks or shapes.
The first recipe is the one my girls enjoy the most. It is very similar in texture to the fruit snacks bought in the stores and costs around $1.00 for each batch. Each batch will make close to the same amount as a small box of fruit snacks.
You will need jello molds which can be found at Walmart or ice cube trays. I use ice cube trays from IKEA that have flower, heart, and star shapes.
Homemade Jello Fruit Snacks Recipe: from Six Sisters' Stuff
Ingredients:1 (3 oz) package gelatin, any flavor
2 (.25 oz) envelopes unflavored gelatin
1/3 c. water
Directions:
Sprinkle the gelatin over the water in a small saucepan. Heat over medium heat and stir until gelatin is completely dissolved. Pour into molds and allow to set at least 20 minutes.
I love the next recipe. It has real fruit making it much tastier and much healthier alternative.This is more grown up fruit snack that even my picky husband enjoys.
Gummy Fruit Snacks from All Day I Dream About Food
1 cup mixed berries
1/4 cup water
1/2 cup applesauce
1/2 cup fruit juice (apple, cranberry, blueberry, whatever)
2 envelopes gelatin (1 envelope = 2 1/2 tsp)
In a small saucepan over medium heat, combine the berries and water. Bring to a boil and cook until berries are soft, about 5 minutes. Transfer to a blender or use an immersion blender to puree berries until smooth. Return to pot. Add applesauce and return to a boil, then remove from heat, cover and set aside.
In a large bowl, sprinkle gelatin over fruit juice and let stand one minute. Add hot fruit mixture and stir until gelatin completely dissolves, 3 to 5 minutes.
Pour into 8 x 8 inch glass or ceramic baking dish (or into molds, if you want to go that route). Refrigerate until firm, about 3 hours. Cut into blocks or shapes.
Wednesday, November 14, 2012
Saving Money: Making your own laundry soap
If you are like any normal American family, you are trying to find ways to save money. One way to save money is to make your own laundry soap. It is so super easy and saves our family money.
It takes about 30 minutes from start to finish and for our family of 5 it lasts about 6 months. When I calculated the costs, it comes out to less than $.01 a load! It has been a huge saving. Depending on your brand, most store bought start from around $.20 a load.
Because of the low sudsing sensation, it works perfectly in HE washers. My clothes have never been so clean. It is gentle on the skin, which is important for our family since the girls and I all have eczema.
My Recipe
1 Cup grated soap (I use Felsneptha but you may use any other bar soap. Favorites are ivory and dove)
1 Quart of water
1 Cup washing soda
1 Cup borax
5 gallon bucket
Let us know what your favorite laundry soap recipe is.
It takes about 30 minutes from start to finish and for our family of 5 it lasts about 6 months. When I calculated the costs, it comes out to less than $.01 a load! It has been a huge saving. Depending on your brand, most store bought start from around $.20 a load.
Because of the low sudsing sensation, it works perfectly in HE washers. My clothes have never been so clean. It is gentle on the skin, which is important for our family since the girls and I all have eczema.
My Recipe
1 Cup grated soap (I use Felsneptha but you may use any other bar soap. Favorites are ivory and dove)
1 Quart of water
1 Cup washing soda
1 Cup borax
5 gallon bucket
- Grate your bar of soap. (I often do this in front of the TV at night when my kids are asleep. One bar of Felsneptha makes two cups so I grate the whole bar and save half for later.)
- Fill the 5 gallon bucket about half full with warm water. Add the washing soda and borax and stir until dissolved.
- Boil 1 quart water in a saucepan. Add grated soap a little at a time until all the soap is melted. Add to the 5 gallon bucket. Stir.
- Fill the bucket almost to the top. Leave some room in case it is too think and you need to add a little water. (I usually fill it in the shower)
- Let sit for several hours. (I continually check on it and stir it)
- Stir until it is fairly smooth. (It will be one solid chunk. I use my hands and arms to stir and break it up.)
Let us know what your favorite laundry soap recipe is.
Subscribe to:
Posts (Atom)